9.7. Plugins in Drupal. How to add block programmatically.
In this tutorial, we will look at how to output blocks programmatically through a custom module in Drupal 8.
Code examples can be viewed on github:
https://github.com/levmyshkin/drupalbook8
Let's start by adding a file containing a PHP class, this is how blocks are created in Drupal through a custom module. The process of creating the file is the same as the class for the page, as we did here:
9.3. Create a custom Drupal module. Output page programmatically.
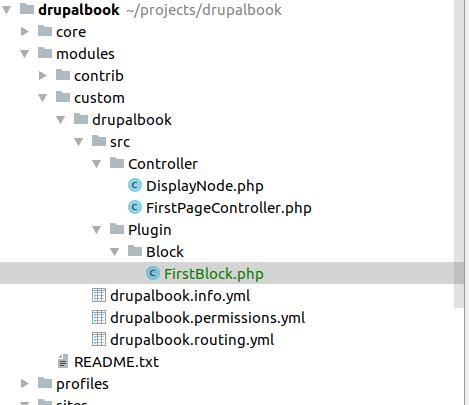
Only we need to create a file with a plugin:
modules/custom/drupalbook/src/Plugin/Block/FirstBlock.php
Let's copy this block code and then parse each of the pieces of code
modules/custom/drupalbook/src/Plugin/Block/FirstBlock.php:
<?php

namespace Drupal\drupalbook\Plugin\Block;

use Drupal\Core\Access\AccessResult;
use Drupal\Core\Block\BlockBase;
use Drupal\Core\Form\FormStateInterface;
use Drupal\Core\Session\AccountInterface;

/**
 * Provides a block with a simple text.
 *
 * @block(
 *   id = "drupalbook_first_block_block",
 *   admin_label = @block("My first block"),
 * )
 */
class FirstBlock extends BlockBase {
  /**
   * {@block}
   */
  public function build() {
    $config = $this->getConfiguration();

    if (!empty($config['drupalbook_first_block_settings'])) {
      $text = $this->t('Hello @Name in block!', ['@Name' => $config['drupalbook_first_block_settings']]);
    }
    else {
      $text = $this->t('Hello World in block!');
    }

    return [
      '#markup' => $text,
    ];
  }

  /**
   * {@block}
   */
  protected function blockAccess(AccountInterface $account) {
    return AccessResult::allowedIfHasPermission($account, 'access content');
  }

  /**
   * {@block}
   */
  public function blockForm($form, FormStateInterface $form_state) {
    $config = $this->getConfiguration();

    $form['drupalbook_first_block_settings'] = [
      '#type' => 'textfield',
      '#title' => $this->t('Name'),
      '#description' => $this->t('Who do you want to say hello to?'),
      '#default_value' => !empty($config['drupalbook_first_block_settings']) ? $config['drupalbook_first_block_settings'] : '',
    ];

    return $form;
  }

  /**
   * {@block}
   */
  public function blockSubmit($form, FormStateInterface $form_state) {
    $this->configuration['drupalbook_first_block_settings'] = $form_state->getValue('drupalbook_first_block_settings');
  }
}
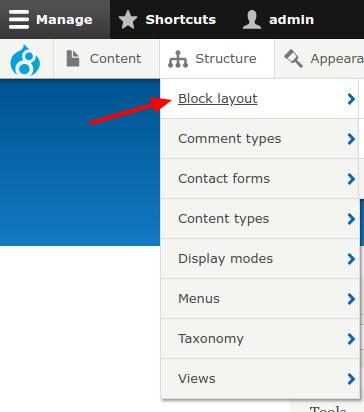
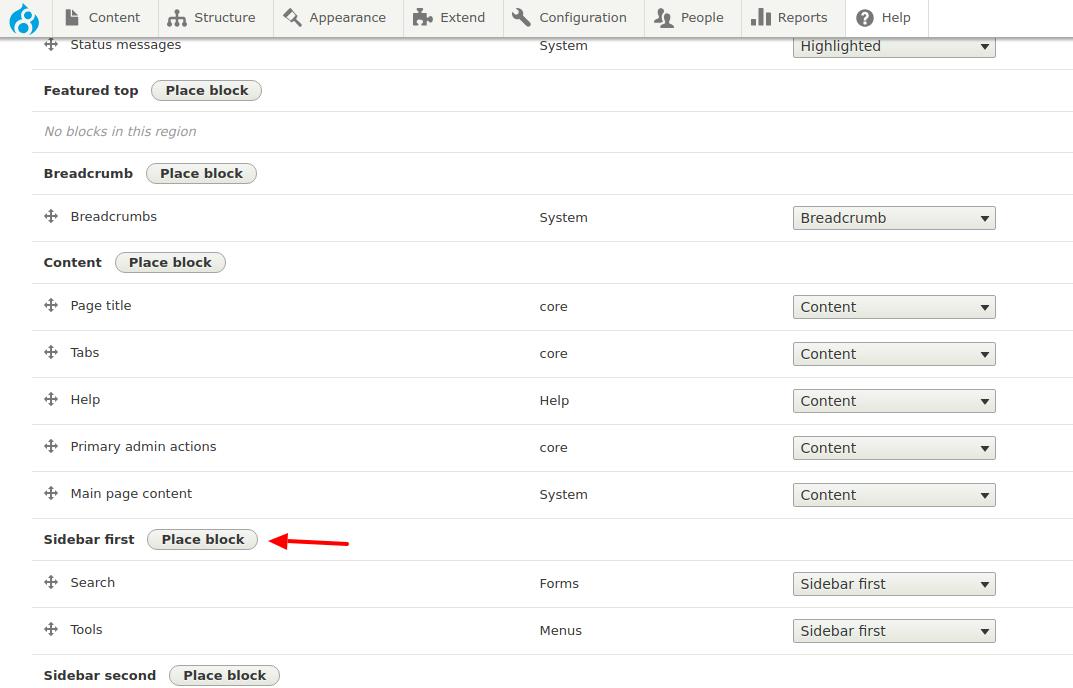
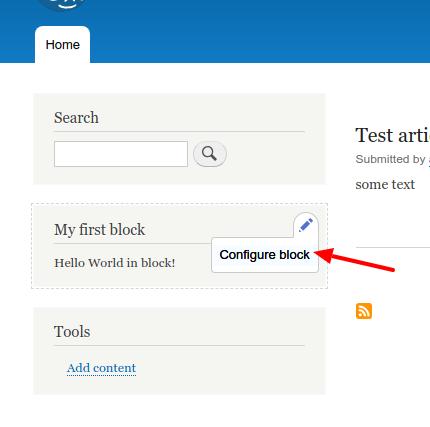
We will display our block in the regina Left Sidebar or another column, where it will be convenient for you.
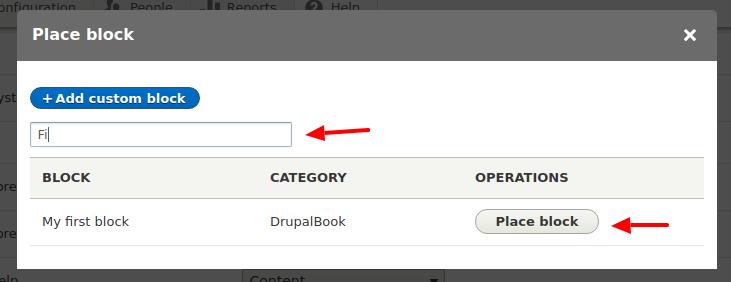
Start typing the name of your block and Drupal will automatically prompt you to select your block. If your block is not there, then check that the desired code is in the right file, and the file is in the right folder, and after that do not forget to clear the cache.
Now that our block is displayed, let's see how the code for adding a block works:

At the beginning of the file, we have namespace, to determine where our block plugin file should be, so that Drupal can automatically connect it. We also include classes from other files using use.
\drupalbook\Plugin\Block;

use Drupal\Core\Access\AccessResult;
use Drupal\Core\Block\BlockBase;
use Drupal\Core\Form\FormStateInterface;
use Drupal\Core\Session\AccountInterface;
Further in the comments is the annotation. We don’t need to define the block somewhere in the YML files, it will be automatically loaded by the Drupal using annotation.

/**
 * Provides a block with a simple text.
 *
 * @block(
 *   id = "drupalbook_first_block_block",
 *   admin_label = @block("My first block"),
 * )
 */
Here we indicate to @block that it will be a block plugin. id, admin_label will be automatically picked up by Drupal, so id must be unique. @block helps translate then the block label through the Drupal admin panel.
extends BlockBase {
We inherit from the BlockBase class, you can hold down ctrl and click on BlockBase in PhpStorm and see what methods can be redefined in our block, we do not use all of them. You can override other methods as needed.
Let's look at the class methods further:
/**
 * {@block}
 */
protected function blockAccess(AccountInterface $account) {
  return AccessResult::allowedIfHasPermission($account, 'access content');
}
We have already considered access to the page in this article, in blocks we can use the same access rights:
https://drupalbook.org/ru/drupal/126-rout-s-parametrom
Here we use the same AccessResult class.
/**
 * {@block}
 */
public function blockForm($form, FormStateInterface $form_state) {
  $config = $this->getConfiguration();

  $form['drupalbook_first_block_settings'] = [
    '#type' => 'textfield',
    '#title' => $this->t('Name'),
    '#description' => $this->t('Who do you want to say hello to?'),
    '#default_value' => !empty($config['drupalbook_first_block_settings']) ? $config['drupalbook_first_block_settings'] : '',
  ];

  return $form;
}
We can use a separate block configuration form for each block that we create programmatically. If you go to the block settings:
Here you can see our Name field, which we added in the blockForm() method:
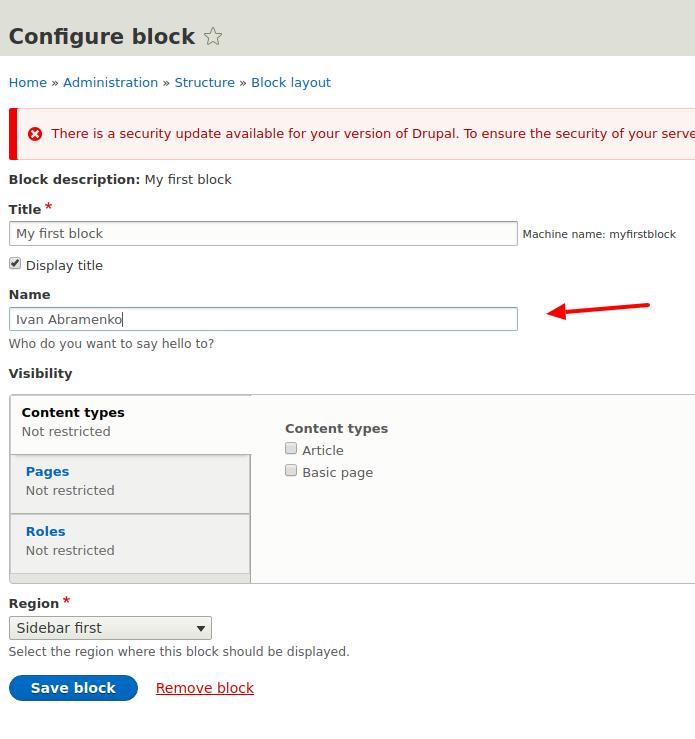
We use the Drupal Form API to create fields for the form:
https://www.drupal.org/docs/8/api/form-api
https://api.drupal.org/api/drupal/elements/8.5.x
We will analyze the Form API in detail in the future and make a multi-step pop-up form. For now, you can see what other types of fields you can use using the Form API. Each field is added using an array. Try adding more fields to the block form.
/**
 * {@block}
 */
public function blockSubmit($form, FormStateInterface $form_state) {
  $this->configuration['drupalbook_first_block_settings'] = $form_state->getValue('drupalbook_first_block_settings');
}
Here we save the value of the fields from the form to the Drupal configuration. We will also consider the configuration in more detail in the following lessons, for now you just need to understand that Drupal has a common storage of all configurations and all modules use this storage of configs. These configs can be transferred from one of your site to another. For example, if you changed the block settings on a local copy of the site, then these configs can be uploaded and uploaded to the live site and your block settings can be applied on the live site.
/**
 * {@block}
 */
public function build() {
  $config = $this->getConfiguration();

  if (!empty($config['drupalbook_first_block_settings'])) {
    $text = $this->t('Hello @Name in block!', ['@Name' => $config['drupalbook_first_block_settings']]);
  }
  else {
    $text = $this->t('Hello World in block!');
  }

  return [
    '#markup' => $text,
  ];
}
And now the main build () method, which displays the content of the block. In this method, we check the configuration of the block and if we have a Name, then we display the text with the name. Pay attention to the $this->t() method, it allows you to translate text through the Drupal admin panel to other languages. We also use placeholder @Name, we need it to translate only the desired text, and not the values of the fields that we enter in configuration forms. This allows you to avoid multiple lines of translation, for example, if you do not use a placeholder, then all options for the text that pass through $this->t() will be available in the admin panel for translation:
Hello Josh ...
Hello Mike ...
Hello Ivan ...
and so on.
I think it became clear to you how to display and configure custom blocks in Drupal 8, then we will consider more complex examples using blocks, pages, forms.
Code examples can be viewed on github:
https://github.com/levmyshkin/drupalbook8